For a long time i’ve wanted to experiment with running a small cluster on my Raspberry Pi’s, but I’ve always had lots of other things to do. Recently i started moving my hosted services from my NAS onto a single Raspberry Pi, and came across a few older Raspberry Pi’s, and thought now is a good a time as any, so here goes.
Hardware used
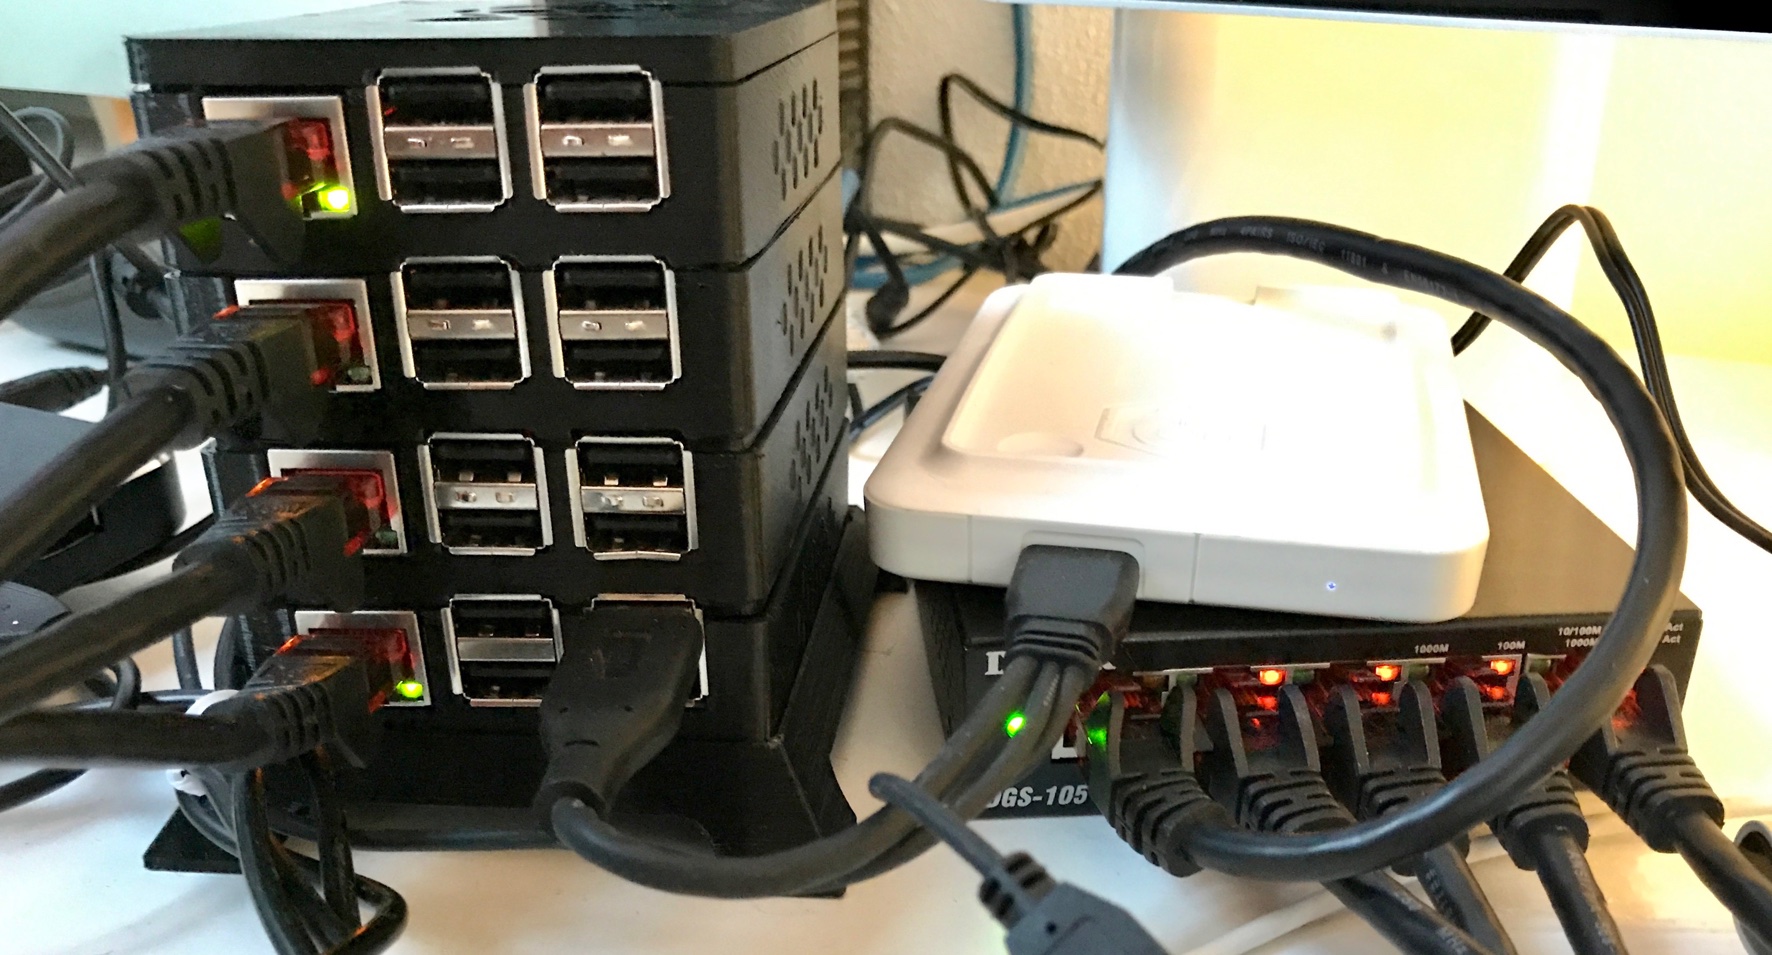
I used the following components:
- 4 Raspberry Pi’s, consisting of :
- two Raspberry Pi 3
- one Raspberry Pi 2
- one Raspberry Pi model B
- A WD 1TB PiDrive (Berryboot Edition)
- A WD PiDrive Enclosure
- A 3d printed enclosure.
- D-Link DGS-105 5 port switch.
- A 5 port USB hub.

Configuring
Each of the Raspberry Pi’s is configured using a standard Raspbian Lite image with ssh enabled.
I went through the setup detailed here, and installed Docker on each Raspbian installation using the installation method from here
I loosely followed this guide for setting up the actual swarm.
Some services, like gogs have specific user requirements, so i took some time and made sure /etc/passwd and /etc/groups were identical on all nodes.
Only one of the nodes has a hard drive attached, so i labelled it “storage=true” The rest of the nodes access this storage area via nfs.
After setting up, i ended up with something like this
$ docker node list
ID                            HOSTNAME            STATUS              AVAILABILITY        MANAGER STATUS
ndgv9pke3xea41r5pgp9z2wbp     rpi0                Ready               Active              Reachable
txswr0rr75qupykdpymtxt00h     rpi1                Ready               Active              Reachable
y5geehj0gzxl5vwwwvi7tlc4b *   ratatosk            Ready               Active              Leader
The swarm is now configured and ready to go.
Adding services
Adding a service to the swarm requires a bit of different syntax than the usual “docker create” syntax. To create a swarm service, you instead use “docker service create”, which publishes the service to the swarm, and the manager node automatically finds a suitable node to host the service, or nodes in case you’ve specified multiple instances.
To create an instance of the Ghost blogging platform, i used the following command
docker service create --name ghost \
--hostname ghost \
-e TZ=Europe/Copenhagen\
-e NODE_ENV=production\
--publish 2368:2368 \
--mount type=bind,src=/data/docker/ghost,dst=/var/lib/ghost \
alexellis2/ghost-on-docker:armv7
Checking the status of a given service can be accomplished simply by typing
docker service ps ghost
Which in turn gives output like this
ID                  NAME                IMAGE                              NODE                DESIRED STATE       CURRENT STATE          ERROR               PORTS
wv9j9vcvtof8        ghost.1             alexellis2/ghost-on-docker:armv7   rpi0                Running             Running 32 hours ago
To view the logs of a running service, you issue
docker service logs ghost
And logs are displayed like the normal “docker logs” command, only the service modifier acquires the logs from the relevant swarm node.
Some services, like Mariadb, would have terrible performance if running via NFS, and this is where the node label comes into play. To limit a service to running on a specific node, a constraint can be set at create time (or via docker service update)
I.e. the following
docker service update --constraint-add node.hostname==ratatosk
Will limit the service to running on a specific host, but what if you have multiple hosts with storage ? This is where you use labels.
docker service update --constraint-add node.labels.storage==true
The above will allow the container to run on any node that has the storage=true option set
Staying up to date
Updating running containers can be accomplished simply by issuing a
docker service update --image lsioarmhf/mariadb:latest mariadb
Now, in case you’re already running the “latest” label, you might need to add a “–force” option to the command, like this
docker service update --force mariadb
Docker will then download the newest image, and recreate your container, which may or may not be on the same node as it was originally running on.
Final adjustments
After having played around with the swarm for a few weeks, I finally got tired of having to take into account the armv6 and armv7 differences between the RPi B and the 2/3 models, and the model B is single core, with 512MB ram, so it’s not likely to be contributing much to the swarm performance anyway, so I decided to remove it from the swarm, and replace it with a new RPi3.
To remove a node from the swarm, i used
docker node update --availability drain rpi2
And waited for the node to be completely emptied. Then it’s simply a question of running
docker node rm rpi2
to remove the node.
Monitoring
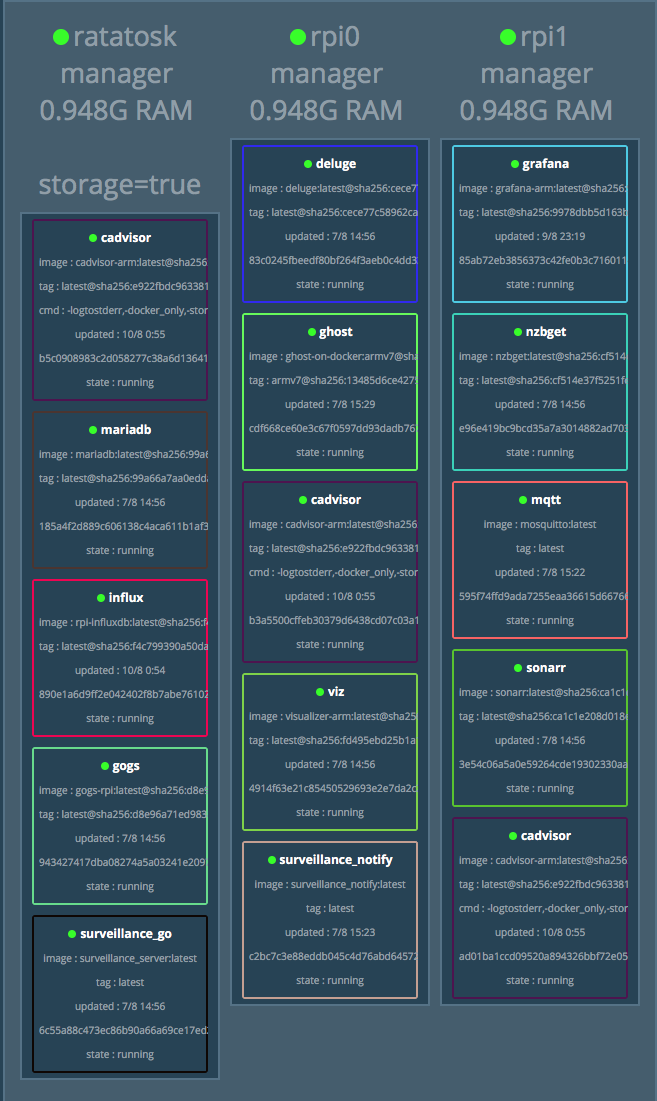
Besides the usual command line monitoring tools, i’ve also found an image called Docker Swarm Visualizer useful.
It provides a birds eye view of your running containers

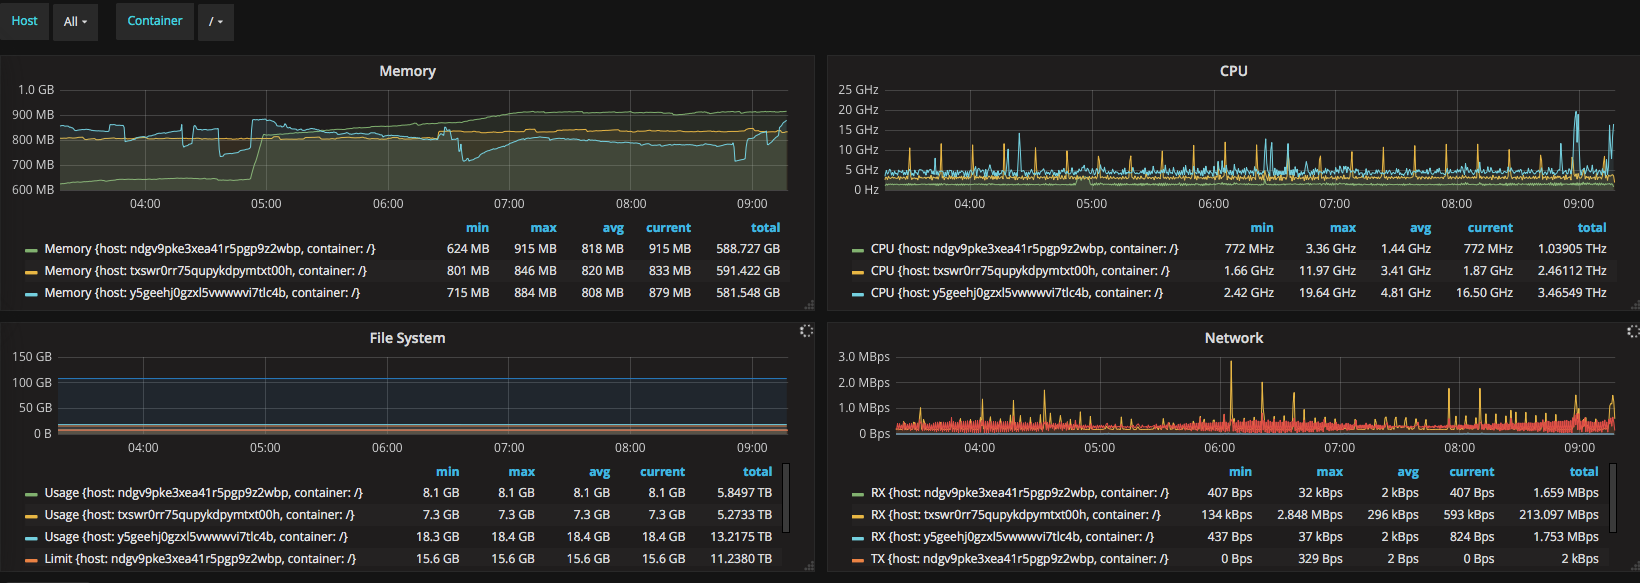
For keeping an eye on system resources, i setup a monitoring solution consisting of Influxdb, cAdvisor, and Grafana. I roughly followed the instructions from this tutorial, though i replaced the images with the following
- Influxdb - hypriot/rpi-influxdb
- cAdvisor - braingamer/cadvisor-arm
- Grafana - easypi/grafana-arm
The result looks something like this

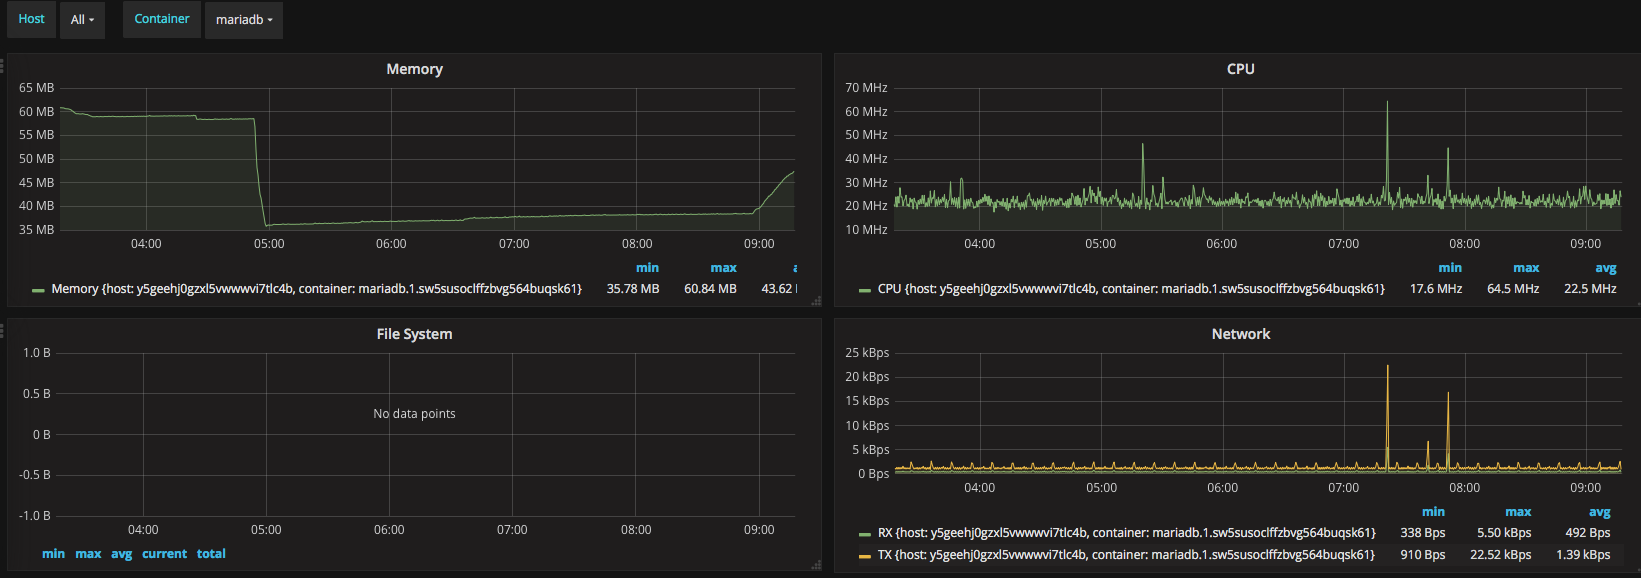
While the above might not contribute much to the overall image of how the system behaves, it does allow you to see if something “sticks out”. Furthermore it allows you to dig down into each container and see how much the individual container is using.

Lessons learned
Is it worth it ? As a learning experience i would say it is certainly worth it. It gives hands-on experience with technologies used in data centers all over the world.
Personally i already ran everything is Docker containers, though mostly on my Synology NAS, so the biggest hurdle has been finding arm compatible containers for the services i run. Sadly arm is not yet a first class citizen when it comes to prebuilt software on docker, and one could argue if it should become that ? it is after all still a “hobby” platform.
Performance wise the Raspberry Pi isn’t exactly a sprinter, but it gets the job done, and is quite capable at service static web pages, running a git server, etc.
My swarm is running 24/7, but my critical services, like surveillance are duplicated on my NAS. Because everything is running with MQTT as the backbone, and messages are broadcast to all subscribers on a given subject, this is easily accomplished. Likewise, IO intensive jobs aren’t really suited for running over USB2, so i’m keeping my database jobs running on the NAS.